A questionnaire is a series of steps or questions.
Accounts will fill out information pertaining to an onboarding.
This can be information being specified, documents being uploaded, signed or reviewed by managers.
NOTE: Before creating a Questionnaire, be sure that the following have already been done:
- HR Forms Library: Upload any forms that will be filled out/signed in the Onboarding Questionnaire
- Update User Fields for Account Details and Account Files
- CLICK HERE for User Field Suggestions
- CLICK HERE for Adding/Editing User Fields
You can create Onboarding Questionnaires in TotalBrokerage by clicking “Human Resources” and then “Onboarding” from your dashboard.

CLICK HERE for Onboarding Questionnaire Suggestions.
Once you enter the page, go to the Actions button at the top right.
Click Add a Questionnaire or click Edit to change an existing onboarding.

You can select whether the Questionnaire belongs to the Brokerage or an Office, and you can give it a name and description.
OPTIONS:
1. Account cannot access TotalBrokerage until this questionnaire is complete: This will make the account unable to work within TotalBrokerage until their onboarding is fully completed.
2. This questionnaire must be completed within a certain time frame: This will send them reminders when the onboarding becomes over due.

Next, you can configure the steps for the Questionnaire.

The first box will be the main information displayed to the user for that step.

The next box will select what happens during this step. There are 6 different types of "Work to Perform".
1. Enter Personal Details: You can configure account details in your User Field Setup and have accounts fill in this information during their onboarding. This will be stored on the details tab of their account.
2. Upload a Required Document: You can configure account files in your User Field Setup and have accounts upload these files during their onboarding. This will be stored on the files tab of their account.
3. Sign a Required Document: You can choose a document from your HR Forms Library for the account being onboarded to fill out and sign. You must also have configured an account file in your User Field Setup for this file to be put into.
4. Upload Miscellaneous Files: Allows the specified person to upload any documents into their Account files.
5. Complete Task: These are instructions or an acknowledgment for the person filling out the questionnaire to complete.
6. General Information: This allows the person filling out the questionnaire to put in their name and phone number.
7. Verify NAR Member ID: This will prompt the user to enter their NAR Member ID number. This will be checked in the NAR database to ensure it is in good standing.

For Enter Personal Details, you will select one of the User Field items for Account Detail to be entered.

For Upload a Required Documents, you will select the Account File Name to be uploaded.

Sign a Required Document: You will select the applicable Account File Name to which the signed document will be uploaded.

You will also need to choose a Form to Sign from your HR Forms Library.

For Upload Miscellaneous Files, Complete Task, and Verify NAR Member ID, there are no custom fields you need to setup.
For the General Information tab, you will select one of the User Fields for General Information to be entered.

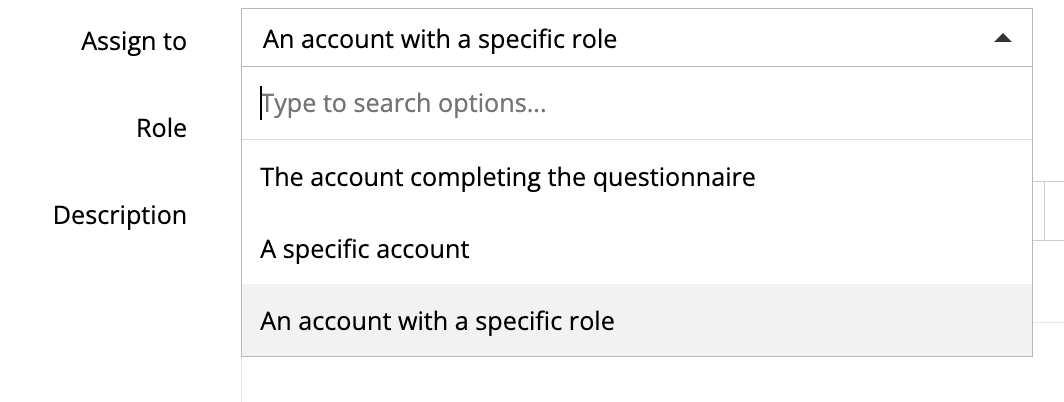
1. The account completing the questionnaire: This is the account that you are onboarding with this questionnaire.
2. A specific account: Once you select this, another selector will prompt you to select the account that needs to complete this step.
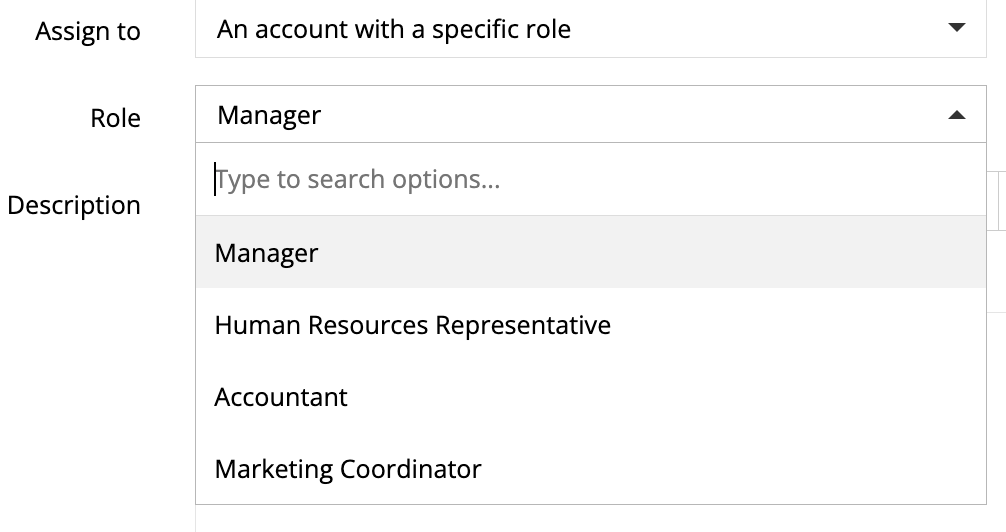
3. An account with a specific role: Once you select this, another selector will prompt you to select the role that needs to complete this task.


In the description field, you can include extra details for the individual completing this step, such as images, links, and HTML content. To import HTML, click the Pencil icon in the toolbar to paste HTML code from sources like a YouTube video or another source. After pasting, click the Pencil icon again to view the embedded content.

The bottom three checkboxes can be used to configure what options at each step.
1. This step is required: This makes the step unable to be skipped.
2. Work for the step should be reviewed when complete: This makes the step have to be reviewed by the person who initiated the onboarding before it is marked as completed.
3. Notify me when that account completes this step: This will send a notification to the person who initiated the onboarding whenever this step is completed.

You can add additional steps by clicking the green Add a Step button at the bottom right.

You can reorganize steps by dragging them from the circled location below.

Be sure to press Save!

ONBOARDING QUESTIONNAIRE SUGGESTIONS (in order of the Work to Perform dropdown menu and color-coded to differentiate the task)
ENTER PERSONAL DETAILS:
Enter your birthday
Enter your Real Estate License Number
Enter your Real Estate License Expiration Date
Enter your Driver's License Number
Enter your Emergency Contact
Enter your Emergency Contact relationship
Enter your Emergency Contact phone number
Enter the Make, Model, and Color of your car
Enter your Real Estate Board Membership affiliation
Enter your Real Estate Board Membership number
Enter the States where you hold a real estate license
Enter your Languages Spoken
Enter your Specialty areas/Certifications
Enter your Agent Real estate website
SIGN A REQUIRED DOCUMENT
Read and Sign the Independent Contractor Agreement
Read and Sign the Commission Agreement
Read and Sign the Team Agreement
Complete and Sign your W-9
Complete and Sign your ACH/Direct Deposit Form
Complete and Sign your Board Membership Form
Complete and Sign your Marketing Form
Complete and Sign your Credit Card Authorization Form
Read & Sign the Policy & Procedures Manual
UPLOAD A REQUIRED DOCUMENT:
Upload a copy of your driver's license
Upload a copy of your real estate license
Upload a copy of your automobile insurance certificate
Upload a copy of any Miscellaneous Documents
COMPLETE TASK
Go to your TotalBrokerage Profile: Set up your Calendar Feed Link
Go to your TotalBrokerage Profile: Create & Save your email signature
Go to your TotalBrokerage Profile: Set up your Notifications preferences
Go to your TotalBrokerage Profile: Create & Save your Bio
Do you have any questions? If you have any questions about this Questionnaire, don't hesitate to contact your Broker or Manager for guidance.
ENTER GENERAL INFORMATION (Personal Info tab):
Enter/Confirm your first name
Enter/Confirm your last name
Enter/confirm your mobile phone number
